Batch Cooking 101: How to Fill Your Freezer in One Afternoon
It’s 6:30 PM on a Wednesday. You’ve just gotten home from work, the kids are hungry, and the last thing you want to do is figure out what’s for dinner. You open the freezer hoping for a miracle—and instead of frozen pizza or takeout menus, you pull out a homemade lasagna that just needs reheating. Dinner is solved in minutes, not hours.
This isn’t a fantasy. This is what happens when you master batch cooking.
Batch cooking is the practice of preparing multiple meals at once and freezing them for later use. Instead of cooking dinner seven nights a week, you dedicate one afternoon to preparing enough meals to fill your freezer with ready-to-heat options. For working moms juggling careers, children, and everything in between, this approach is a game-changer.
The beauty of batch cooking is that it doesn’t require culinary expertise or expensive equipment. With basic kitchen skills, a few hours of focused work, and the right strategy, you can stock your freezer with two to four weeks of dinners. No more scrambling at 6 PM. No more drive-through runs because you’re too exhausted to cook. Just open the freezer, reheat, and serve.
This guide will walk you through everything you need to know about batch cooking, from planning your cooking session to selecting the best freezer meals for beginners. By the end, you’ll have a clear roadmap for transforming one afternoon into weeks of stress-free dinners.
Why Batch Cooking Works for Busy Families
Before diving into the how-to, let’s understand why batch cooking is so effective for working families.
Time Efficiency
Cooking one meal takes roughly the same amount of time as cooking three or four of the same meal. You’re chopping vegetables once, using the same pots and pans, and cleaning the kitchen once. When you batch cook, you’re multiplying your output without multiplying your effort. That single afternoon of work eliminates hours of weeknight cooking over the following weeks.
Cost Savings
Buying ingredients in bulk for batch cooking is significantly cheaper than purchasing small quantities for individual meals. A family pack of chicken breasts costs less per pound than buying two breasts at a time. When you plan multiple meals around the same core ingredients, you reduce waste and maximize your grocery budget.
Reduced Decision Fatigue
One of the most exhausting parts of weeknight cooking isn’t the actual cooking—it’s deciding what to make. Batch cooking eliminates this daily decision because your meals are already planned and prepared. You simply choose from your freezer inventory.
Healthier Eating
When you’re tired and hungry, fast food becomes tempting. Having homemade meals ready to heat means you’re far more likely to feed your family nutritious, home-cooked food instead of relying on processed convenience options or restaurant meals.
Stress Reduction
Knowing your freezer is stocked with ready-made dinners provides genuine peace of mind. One less thing to worry about during your already busy week makes a measurable difference in daily stress levels.
Essential Equipment for Batch Cooking
You don’t need a professional kitchen to succeed at batch cooking, but having the right tools makes the process significantly easier.
Must-Have Items
Large pots and pans: You’ll need at least one large stockpot (8-12 quarts) and one or two large skillets or sauté pans. Cooking in bigger batches requires bigger vessels.
Sharp knives and cutting boards: You’ll be doing a lot of chopping. A sharp chef’s knife and multiple cutting boards (to prevent cross-contamination between raw meat and vegetables) are essential.
Mixing bowls in various sizes: Multiple bowls allow you to prep ingredients efficiently and keep different components organized.
Measuring cups and spoons: Accurate measurements ensure consistent results across multiple batches.
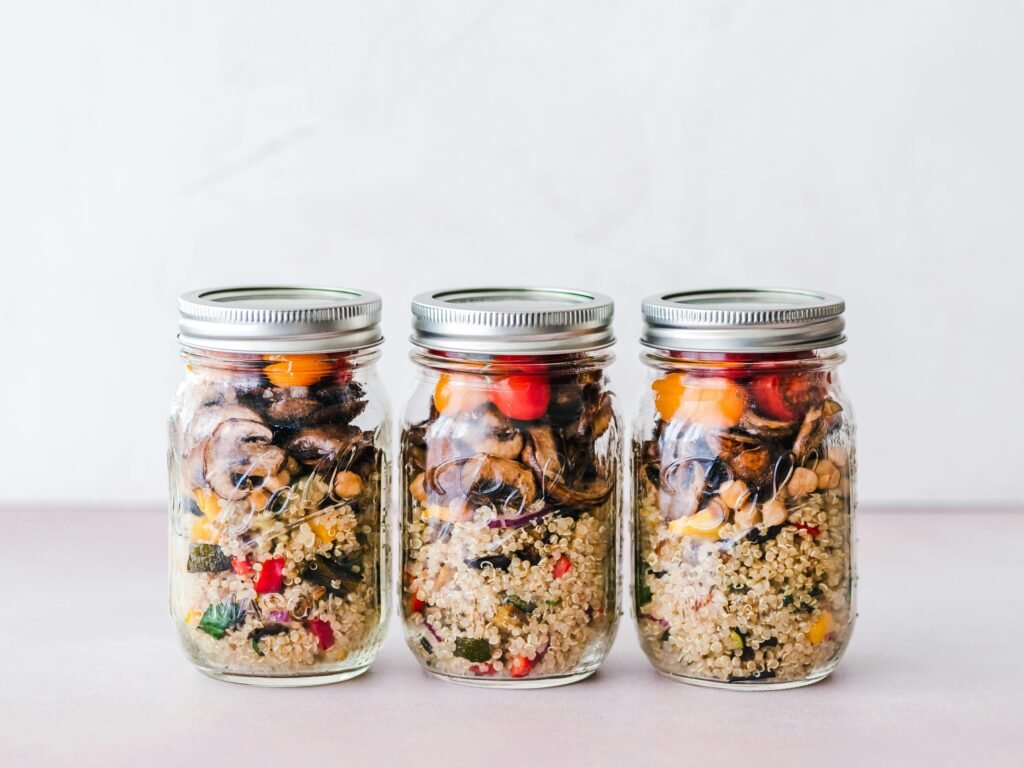
Freezer-safe containers: This is critical. You need containers specifically designed for freezer storage. Options include:
- Heavy-duty freezer bags (gallon and quart sizes)
- Glass containers with airtight lids (these must be freezer-safe)
- Aluminum pans with fitted lids (great for casseroles and lasagnas)
- Reusable silicone bags
Permanent markers or labels: Proper labeling prevents mystery meals and ensures you use items before they lose quality.
Nice-to-Have Items
Slow cooker or Instant Pot: These appliances allow you to cook large quantities with minimal supervision, freeing you up for other prep work.
Food processor: Dramatically speeds up chopping vegetables and shredding cheese.
Kitchen scale: Helpful for portioning proteins and ensuring even distribution across meals.
Extra freezer space: A chest freezer isn’t necessary for beginners, but if batch cooking becomes a regular practice, the additional storage is valuable.
Planning Your Batch Cooking Session
Success in batch cooking starts with proper planning. Walking into the kitchen without a plan leads to chaos and wasted time.
Choose Your Meals Strategically
For your first batch cooking session, select four to six recipes that meet these criteria:
They freeze well: Not all foods are suitable for freezing. Focus on soups, stews, casseroles, marinated proteins, and sauced dishes. Avoid recipes with ingredients that don’t freeze well, like cream-based sauces (they can separate), raw vegetables with high water content (cucumber, lettuce), and fried foods (they become soggy).
They use overlapping ingredients: Choose recipes that share common ingredients to reduce shopping complexity and prep time. If three recipes call for diced onions, you can chop all the onions at once.
They match your family’s preferences: Don’t batch cook meals your family won’t eat. Stick with proven favorites, especially for your first attempt.
They have different protein sources: Variety prevents menu fatigue. Include chicken, beef, and meatless options.
Best Freezer Meals for Beginners
If you’re new to batch cooking, these freezer meals for beginners are reliable, forgiving, and family-friendly:
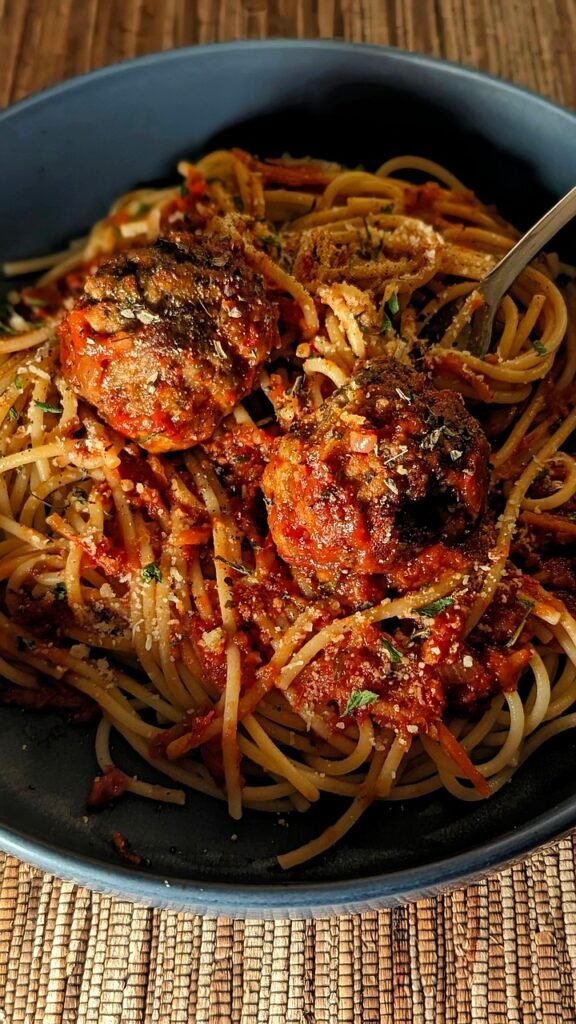
- Chili: Freezes perfectly and reheats beautifully
- Spaghetti sauce or meat sauce: Make a huge batch and freeze in meal-sized portions
- Chicken enchiladas: Assemble in aluminum pans, freeze unbaked
- Meatballs: Form, freeze on trays, then transfer to bags
- Marinated chicken breasts: Mix marinade in freezer bags with raw chicken
- Beef stew: Classic comfort food that improves after freezing
- Pulled pork or shredded chicken: Cook large quantities, portion, and freeze
Create Your Shopping List
Once you’ve selected your recipes, create a comprehensive shopping list. Calculate the quantities needed for multiple batches and organize your list by grocery store section (produce, meat, dairy, pantry) to make shopping efficient.
Don’t forget freezer supplies: Add freezer bags, aluminum pans, or containers to your list if you need them.
Schedule Your Cooking Session
Block out 4-6 hours for your first batch cooking session. Many people choose Sunday afternoons, but any day that allows uninterrupted time works. Don’t try to batch cook when you’re already exhausted—you need energy and focus for this work.
Consider enlisting help. A partner can assist with prep work, and older children can help with age-appropriate tasks like stirring or assembling ingredients.
Step-by-Step Batch Cooking Process
Here’s how to execute your batch cooking session efficiently.
Step 1: Set Up Your Kitchen (15-20 minutes)
Before you start cooking, prepare your workspace:
- Clear and clean all counter space
- Set out all equipment you’ll need
- Lay out recipes where you can easily reference them
- Pre-measure any dry ingredients that appear in multiple recipes
- Fill your sink with hot soapy water for ongoing cleanup
A clean, organized workspace is critical for efficiency. You’ll be moving quickly between tasks, and clutter slows you down.
Step 2: Prep All Ingredients (60-90 minutes)
This is where batch cooking becomes efficient. Instead of prepping ingredients for one meal at a time, you prep everything at once.
Vegetables: Wash, peel, and chop all vegetables needed for all recipes. Group similar vegetables together. Dice all onions, then all bell peppers, then all carrots. Store each prepared vegetable in its own bowl or container.
Proteins: Trim, cut, or portion all meats. If multiple recipes use ground beef, brown all the ground beef in large batches. If you’re making marinated chicken, prepare all the chicken at once.
Seasonings and sauces: Mix any spice blends or sauce bases that appear in multiple recipes.
This assembly-line approach might feel strange at first, but it’s significantly faster than stopping to chop an onion each time a recipe calls for one.
Step 3: Cook in Parallel (90-120 minutes)
Now the actual cooking begins. The key is working on multiple dishes simultaneously:
- Start anything that requires long cooking times first (slow-cooked meats, bone broths, stews)
- While those cook, work on assembly tasks (enchiladas, lasagnas, casseroles)
- Use downtime to portion cooked items into freezer containers
- Keep the sink cycle going—wash dishes as you finish with them to prevent overwhelming cleanup later
Think like a restaurant kitchen: You’re constantly moving between stations, checking on what’s cooking while prepping the next component.
Step 4: Cool and Package (45-60 minutes)
This step is crucial for food safety and quality. Never put hot food directly into the freezer.
Cooling: Spread hot foods in shallow containers to speed cooling. Place them in the refrigerator (not on the counter) to cool to room temperature. This usually takes 30-60 minutes.
Portioning: Divide meals into family-sized portions. Consider your family’s eating patterns—do you need portions for four people, or do you want individual servings for quick lunches?
Packaging: Transfer cooled food to freezer containers. Remove as much air as possible from freezer bags to prevent freezer burn. Leave about half an inch of headspace in rigid containers to allow for expansion as food freezes.
Labeling: This is non-negotiable. Label every container with:
- The dish name
- The date you prepared it
- Reheating instructions
- Any additional ingredients needed (pasta to cook separately, garnishes)
Use a permanent marker directly on freezer bags, or masking tape on rigid containers.
Step 5: Freeze Strategically (15 minutes)
Freeze items flat when possible. Lay freezer bags flat on a baking sheet until frozen solid, then you can stack them vertically like files in a drawer. This saves space and makes it easy to see what you have.
Don’t overload your freezer at once. Adding too much warm food raises the freezer temperature and can compromise items already frozen. If you’ve made a massive batch cooking haul, freeze items in stages over 24 hours.
Maximizing Efficiency: Pro Tips
These strategies take your batch cooking from good to great.
Use Theme-Based Batching
Instead of making completely different meals, use a theme approach:
Mexican theme: Make taco meat, shredded chicken, enchiladas, and burrito filling all in one session. They share ingredients (beans, peppers, onions, spices) and similar prep work.
Italian theme: Prepare marinara sauce, meatballs, lasagna, and Italian sausage with peppers. Again, overlapping ingredients and techniques.
This approach reduces the number of different ingredients you need to buy and prep.
Double Your Regular Recipes
If you already make a great chili or spaghetti sauce, simply double or triple the recipe next time you make it. Eat one portion fresh and freeze the rest. This is the easiest entry point into batch cooking—you’re not learning new recipes, just making more of what you already know.
Cook Proteins Separately
For ultimate flexibility, cook and freeze proteins separately from sauces or sides:
- Grill or bake multiple pounds of chicken breasts, cool, slice, and freeze
- Brown several pounds of ground beef with basic seasonings, portion, and freeze
- Slow cook a large pork roast, shred, and freeze in portions
When you need a quick meal, combine the frozen protein with fresh or pantry ingredients. Frozen cooked chicken becomes fajitas, chicken salad, or pasta topping in minutes.
Invest in Prep Time
If chopping vegetables feels overwhelming, buy pre-cut vegetables from the grocery store for your batch cooking session. Yes, they cost more, but if it’s the difference between batch cooking or not batch cooking at all, it’s worth the investment.
Keep a Freezer Inventory
Maintain a simple list (on your phone, on the freezer door, or in a meal planning app) of what’s in your freezer. Update it when you add or remove items. This prevents the “I forgot I had that” scenario that leads to food waste.
Reheating and Serving Frozen Meals
Making the meals is only half the battle. You need to know how to safely and effectively reheat them.
Safe Thawing Methods
Refrigerator thawing (safest): Move frozen meals from freezer to refrigerator 24 hours before you plan to eat them. This is the safest method and works well for casseroles, soups, and stews.
Cold water thawing: Submerge sealed freezer bags in cold water, changing the water every 30 minutes. This takes 1-3 hours depending on the meal size.
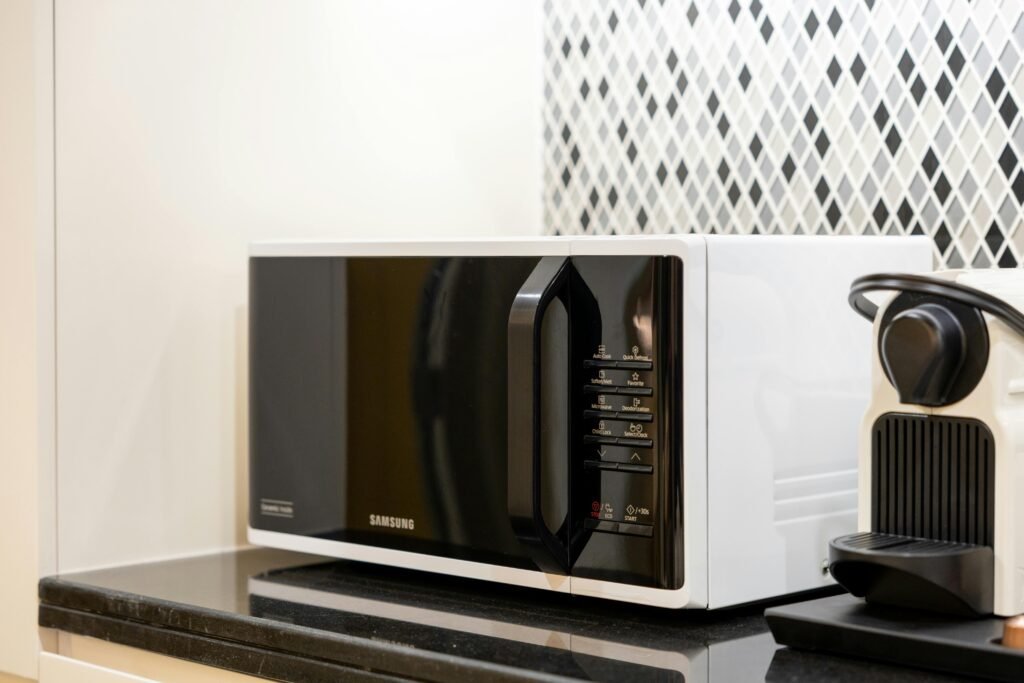
Microwave thawing: Use your microwave’s defrost setting, but plan to cook the food immediately after thawing.
Never thaw food on the counter. The outer portions can reach unsafe temperatures while the center is still frozen.
Reheating Guidelines
Oven: Best for casseroles, enchiladas, and baked dishes. Cover with foil and reheat at 350°F until the internal temperature reaches 165°F. Remove foil for the last 10 minutes to crisp the top.
Stovetop: Ideal for soups, stews, chilis, and sauces. Thaw first, then reheat over medium heat, stirring occasionally. Add a splash of water or broth if the mixture seems too thick.
Microwave: Works for individual portions. Reheat in 2-minute intervals, stirring between intervals, until steaming hot throughout.
Slow cooker: Place frozen soup or stew in the slow cooker in the morning, cook on low for 6-8 hours. This only works for foods that are already fully cooked.
Always verify that reheated food reaches 165°F in the center before serving. Use a food thermometer to confirm.
Troubleshooting Common Batch Cooking Challenges
Even experienced batch cooks encounter obstacles. Here’s how to address them.
“I don’t have enough time”
Solution: Start smaller. Instead of a full afternoon producing 20 meals, spend 90 minutes making double batches of two favorite recipes. As you get faster and more comfortable, expand your sessions. You don’t have to fill your entire freezer in one session.
“My freezer is too small”
Solution: Focus on compact items. Soups and sauces in freezer bags take up less space than casseroles in rigid pans. Freeze items flat, then stack vertically. Remove excess air from all containers. Consider whether some items currently in your freezer could be removed or used up to make room.
“My family won’t eat leftovers”
Solution: Batch cooking isn’t the same as leftovers. These are frozen meals, often weeks old by the time you serve them, so they feel “new” rather than leftover. Also, if you batch cook different recipes, you’re offering variety, not the same meal repeatedly. Presentation matters too—serve the meal on fresh plates with fresh sides, not straight from the container.
“The texture changes when I freeze certain foods”
Solution: Some ingredients do change texture when frozen. Slightly undercook pasta and vegetables that will be in casseroles—they’ll finish cooking during reheating and won’t become mushy. Add fresh toppings after reheating (sour cream, cheese, fresh herbs) to improve texture and presentation. For cream-based soups, freeze the base without cream, then add cream during reheating.
“I get bored eating the same things”
Solution: Batch cook a variety of meals, and supplement with fresh meals throughout the week. You don’t have to eat freezer meals every single night. Use them strategically on your busiest nights. Also, keep your batch cooking sessions varied—don’t make the same six meals every month. Rotate through different recipes.
Creating a Sustainable Batch Cooking Routine
One batch cooking session is helpful. A regular batch cooking practice is transformative.
Establish a Rhythm
Many successful batch cooks dedicate one afternoon per month to filling their freezer. Others prefer to do smaller sessions every other week. Find a schedule that fits your life and stick to it.
Put your batch cooking sessions on the calendar like any other important appointment. This consistency ensures you always have freezer meals available.
Build Your Recipe Collection
Start a collection of freezer-friendly recipes that your family enjoys. Keep them in a binder, on your phone, or in a meal planning app. Rate each recipe after you try it and make notes about what worked and what didn’t.
Over time, you’ll develop a rotation of 15-20 reliable recipes. This takes the guesswork out of planning future batch cooking sessions.
Involve Your Family
Make batch cooking a family event. Older children can help with age-appropriate tasks like measuring ingredients, stirring, or assembling meals. Even younger children can help tear lettuce or place ingredients in containers. Teaching children about meal preparation builds valuable life skills.
Plus, when children participate in making meals, they’re more likely to eat those meals without complaint.
Track Your Costs and Time
For the first few months, keep track of how much you spend on groceries for batch cooking and how much time each session takes. Compare this to your previous grocery spending and time spent on weeknight cooking.
Seeing the tangible savings in both money and time reinforces the value of batch cooking and motivates you to maintain the practice.
Conclusion
Batch cooking transforms the daily stress of “what’s for dinner?” into a manageable, once-a-month task. By dedicating one afternoon to preparing multiple meals, you create weeks of stress-free dinners that are healthier and more cost-effective than takeout or convenience foods.
The key principles that make batch cooking work are strategic planning, efficient execution through parallel cooking and ingredient prep, proper cooling and freezing techniques, and consistent practice. Freezer meals for beginners should focus on simple, family-friendly recipes that freeze and reheat well—soups, casseroles, marinated proteins, and sauced dishes.
Remember that batch cooking is a skill that improves with practice. Your first session might feel chaotic or overwhelming, but each time you do it, you’ll get faster, more organized, and more confident. The investment of a few hours today pays dividends throughout the following weeks every time you open your freezer instead of a takeout menu.
The goal isn’t perfection. The goal is reducing the mental and physical load of feeding your family nutritious meals during your busiest weeks. Even a freezer with just five or six meals provides meaningful relief on exhausting weeknights.
Take Control of Your Meal Planning
Ready to extend this organized, stress-free approach beyond batch cooking? The same planning principles that make batch cooking successful apply to all aspects of meal planning and preparation.
Whether you’re looking to master weekly meal prep, create rotating menu plans that eliminate decision fatigue, or develop efficient grocery shopping strategies, comprehensive meal planning resources can help you build a complete system that works for your family’s unique needs and schedule.
Explore meal planning guides, printable templates, and expert strategies to create a sustainable approach to feeding your family that reduces stress, saves money, and frees up your time for the things that matter most. Your journey to easier, more organized meals starts with just one batch cooking session—and continues with thoughtful planning and proven strategies.